How to give a course with only illustrations?
How to give a course with only illustrations?
Q&A Teaching Service Design
Flipped classroom model for Service Design
Flipped classroom model for Service Design
Service Design curriculum
Service Design curriculum
Inclusive Service Design teaching
Inclusive Service Design teaching
Improving the teaching
Improving the teaching
Grading Service Design work
Grading Service Design work
Corporate Service Design training
Corporate Service Design training
Teaching Swiss Service Design
Teaching Swiss Service Design
Inspirations for teaching Service Design
Inspirations for teaching Service Design
Proving and showing impact as a Service Design student
Proving and showing impact as a Service Design student
In short:
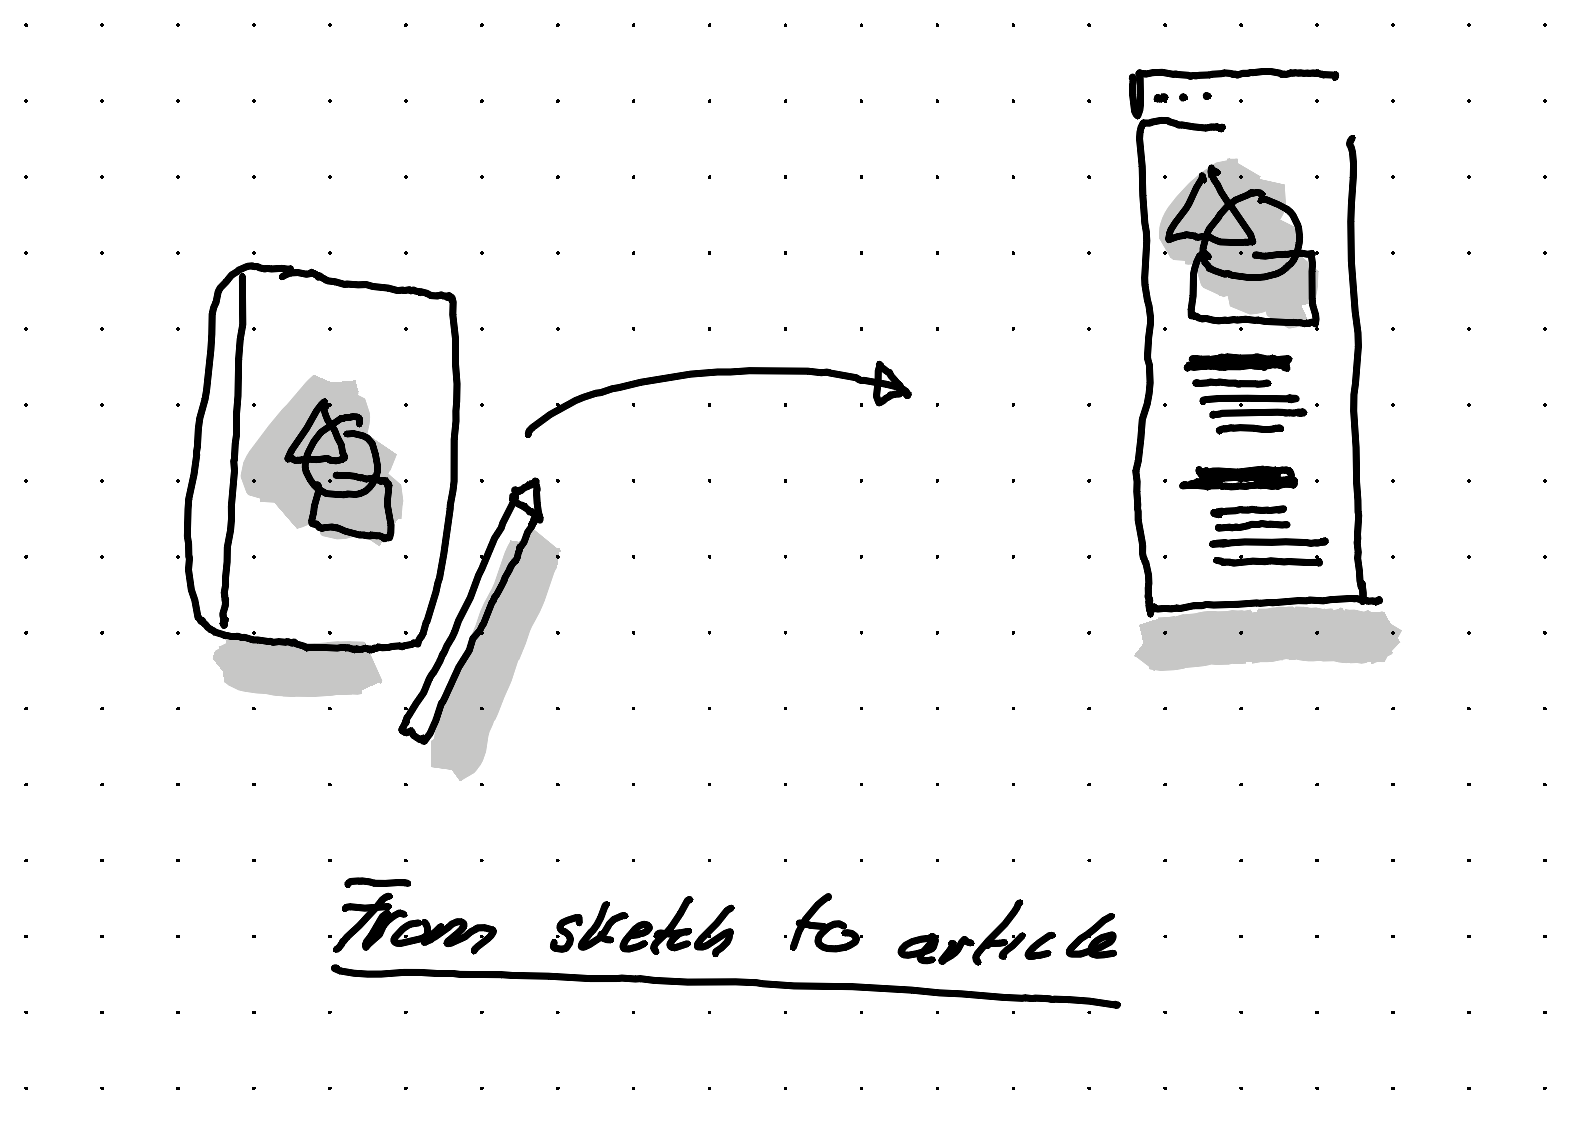
Draw in small format to think and plan.
Re-draw in big format for the class.
Write about the sketches to add depth, tease the class with this and add it as references for the curious learners
Hide and reveal each sketch during the class to guide the class.
Context
At the moment I'm trying to change the types of tools I use. Which means that I try to do most of my thinking, planning and writing work on a refurbished Remarkable II tablet.
As I'm changing tools, this has also an impact on my teaching. Instead of using digital slides as the basis of my courses, I'm trying other ways, For example: using sketches.
Sketch to plan and think
For a new class I've been invited to host, I decided to first sketch the course. I sketched out five key concepts that I wanted to share with the learners of the different Masters in Design of the HSLU.
I made these sketches on my Remarkable II tablet.
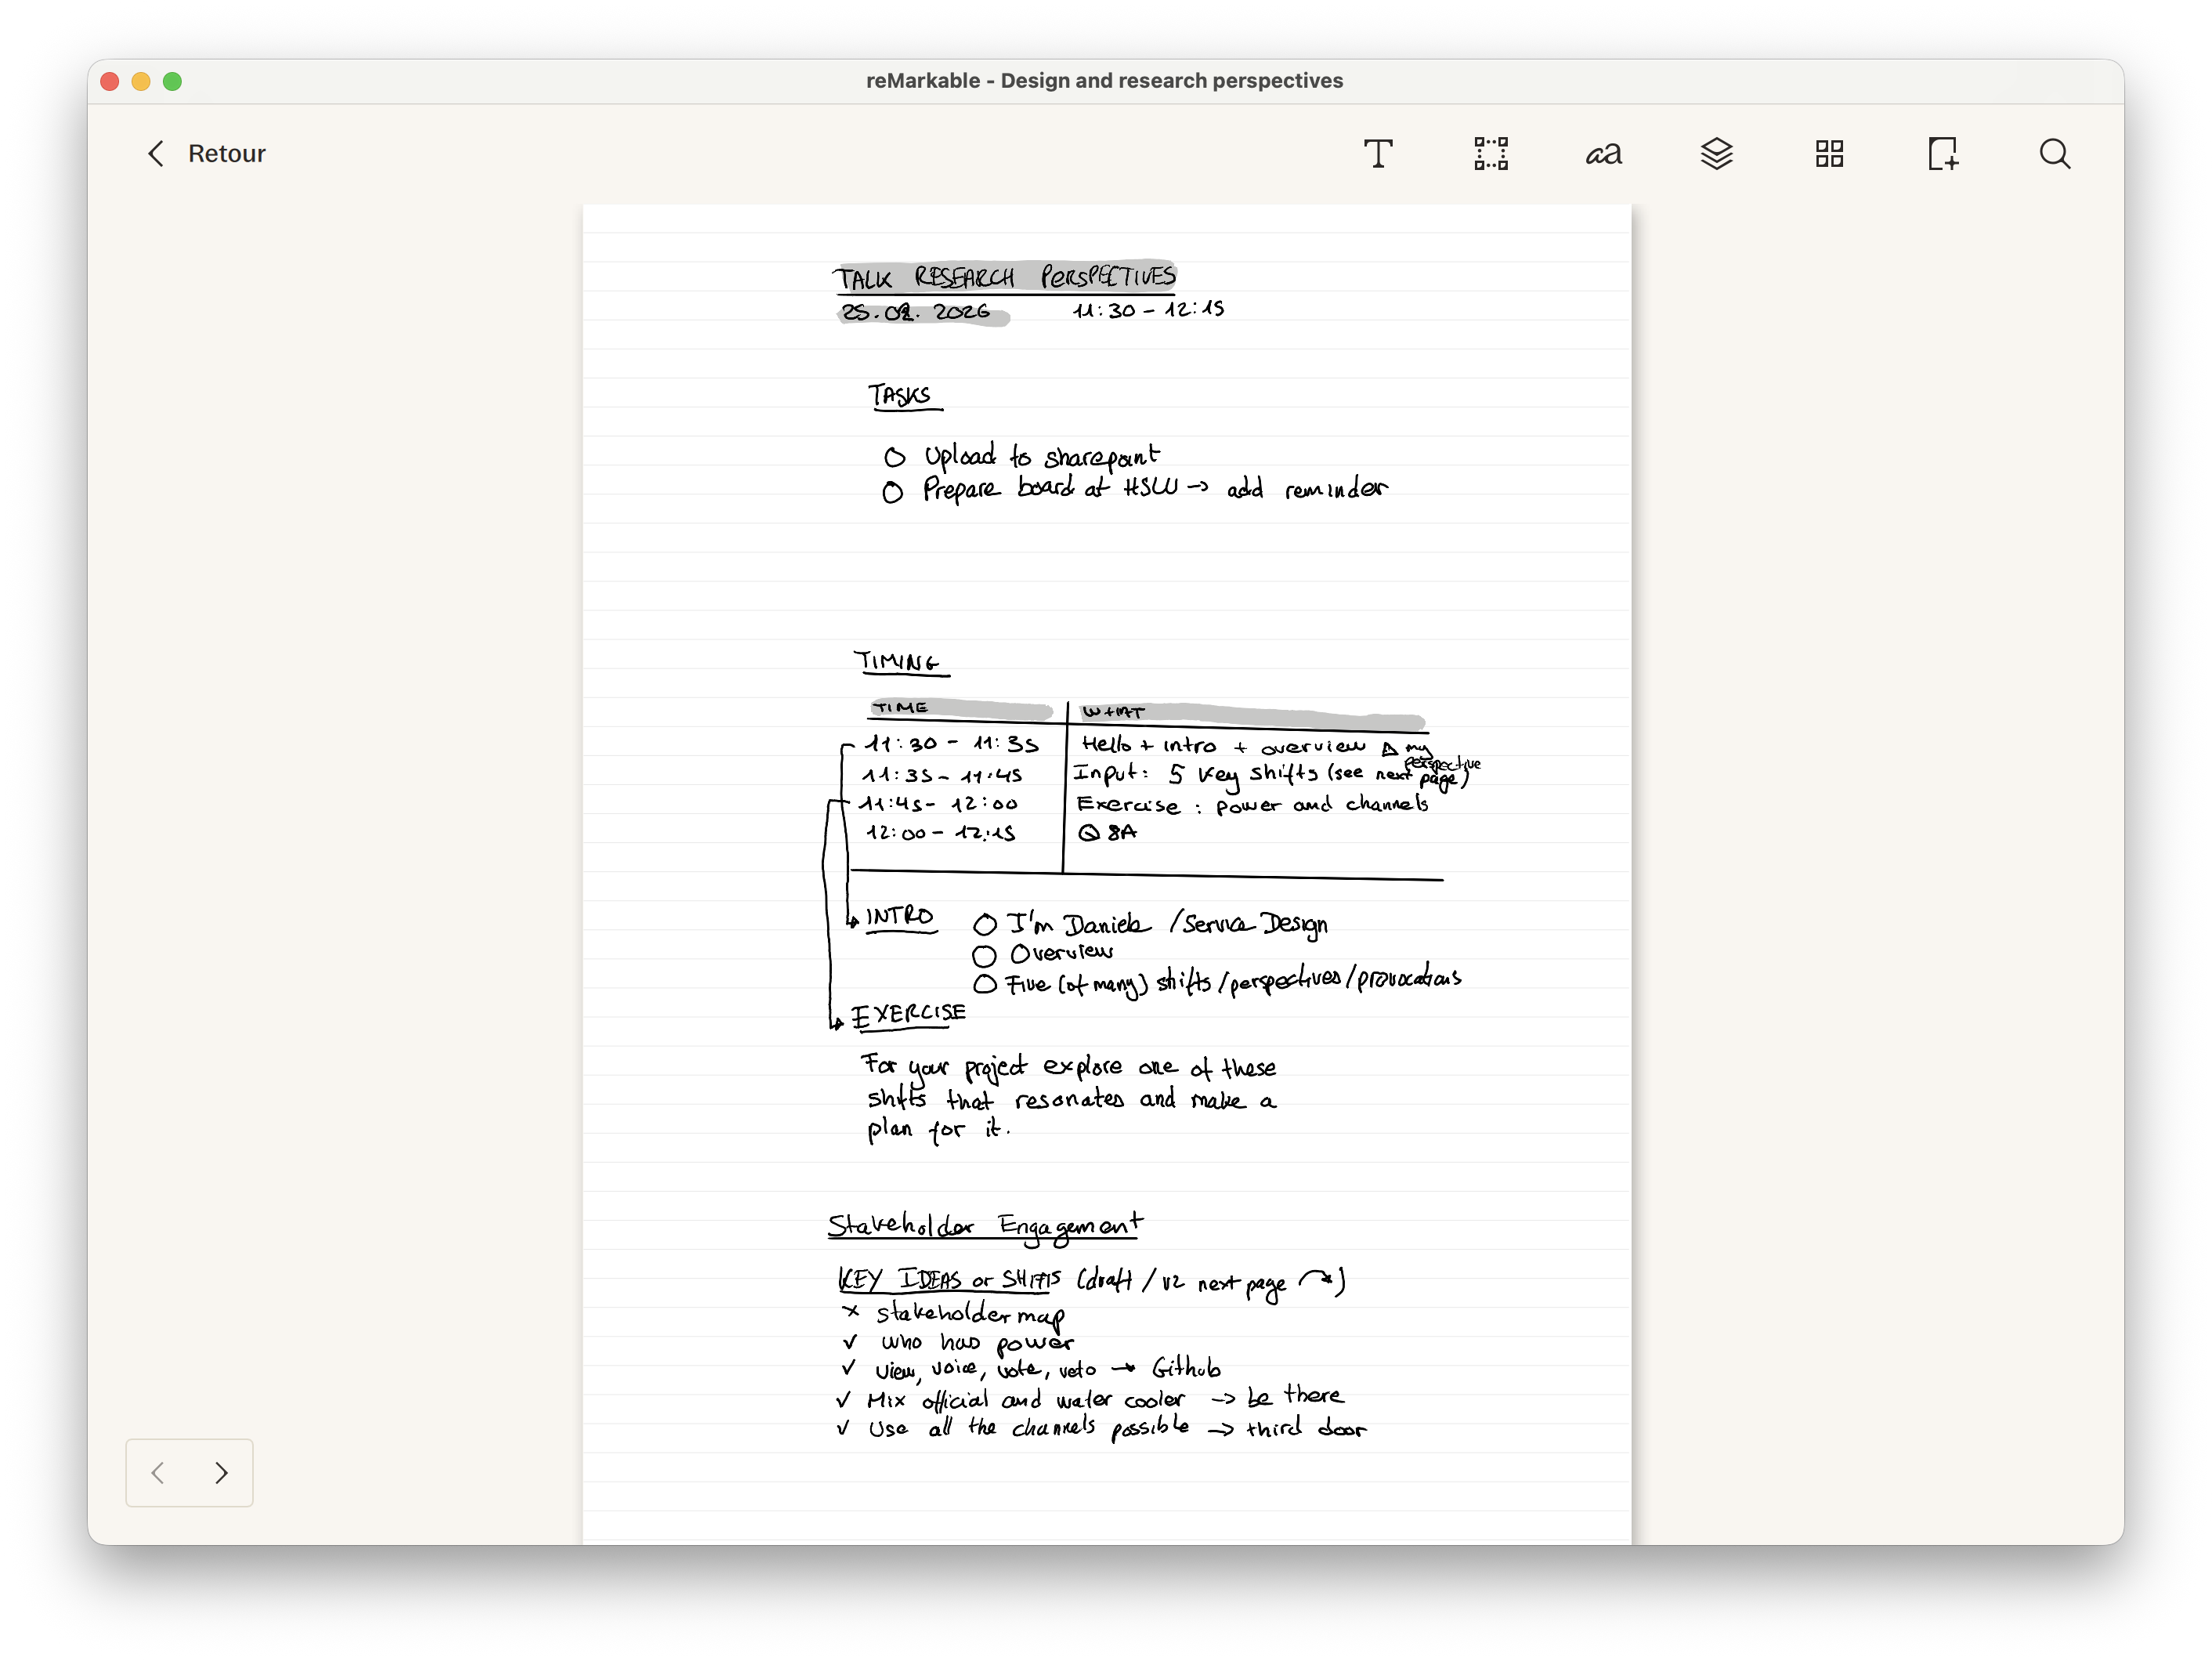
A screenshot showing rough notes I took to structure the course including the timing, exercice, and key ideas
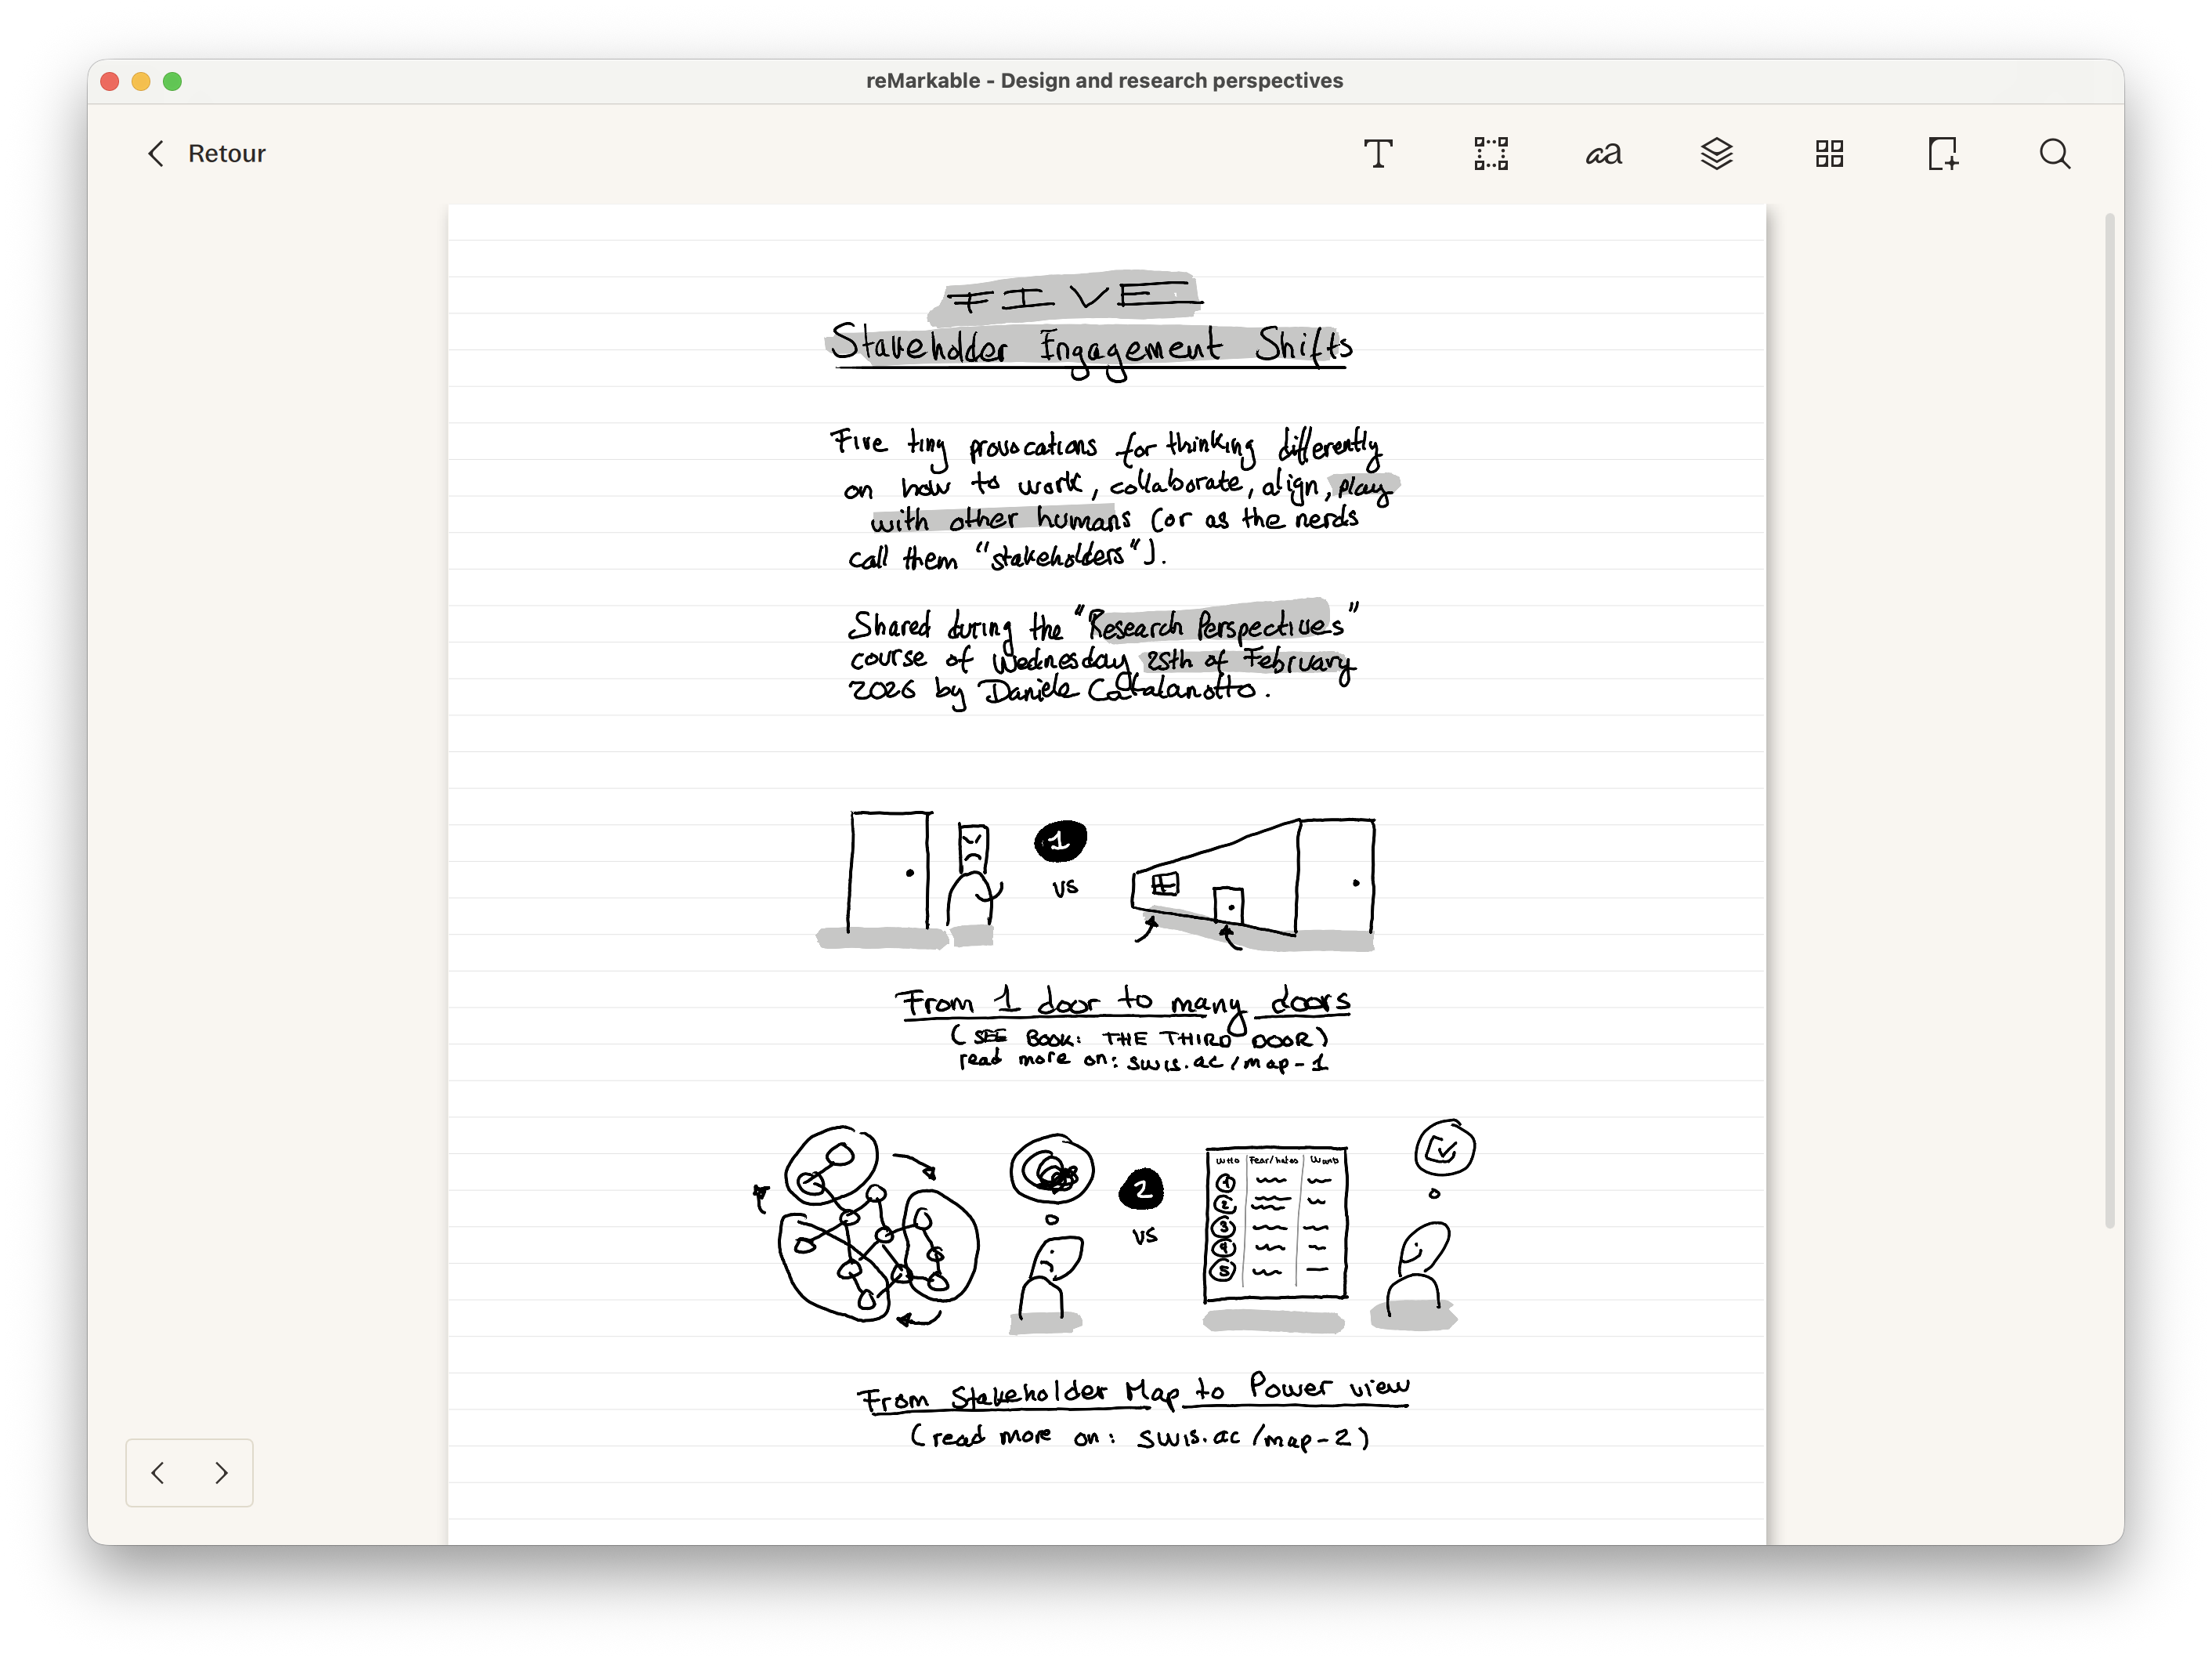
A screenshot showing a few of the sketches of the course that were also exported as a PDF
Re-sketch to share
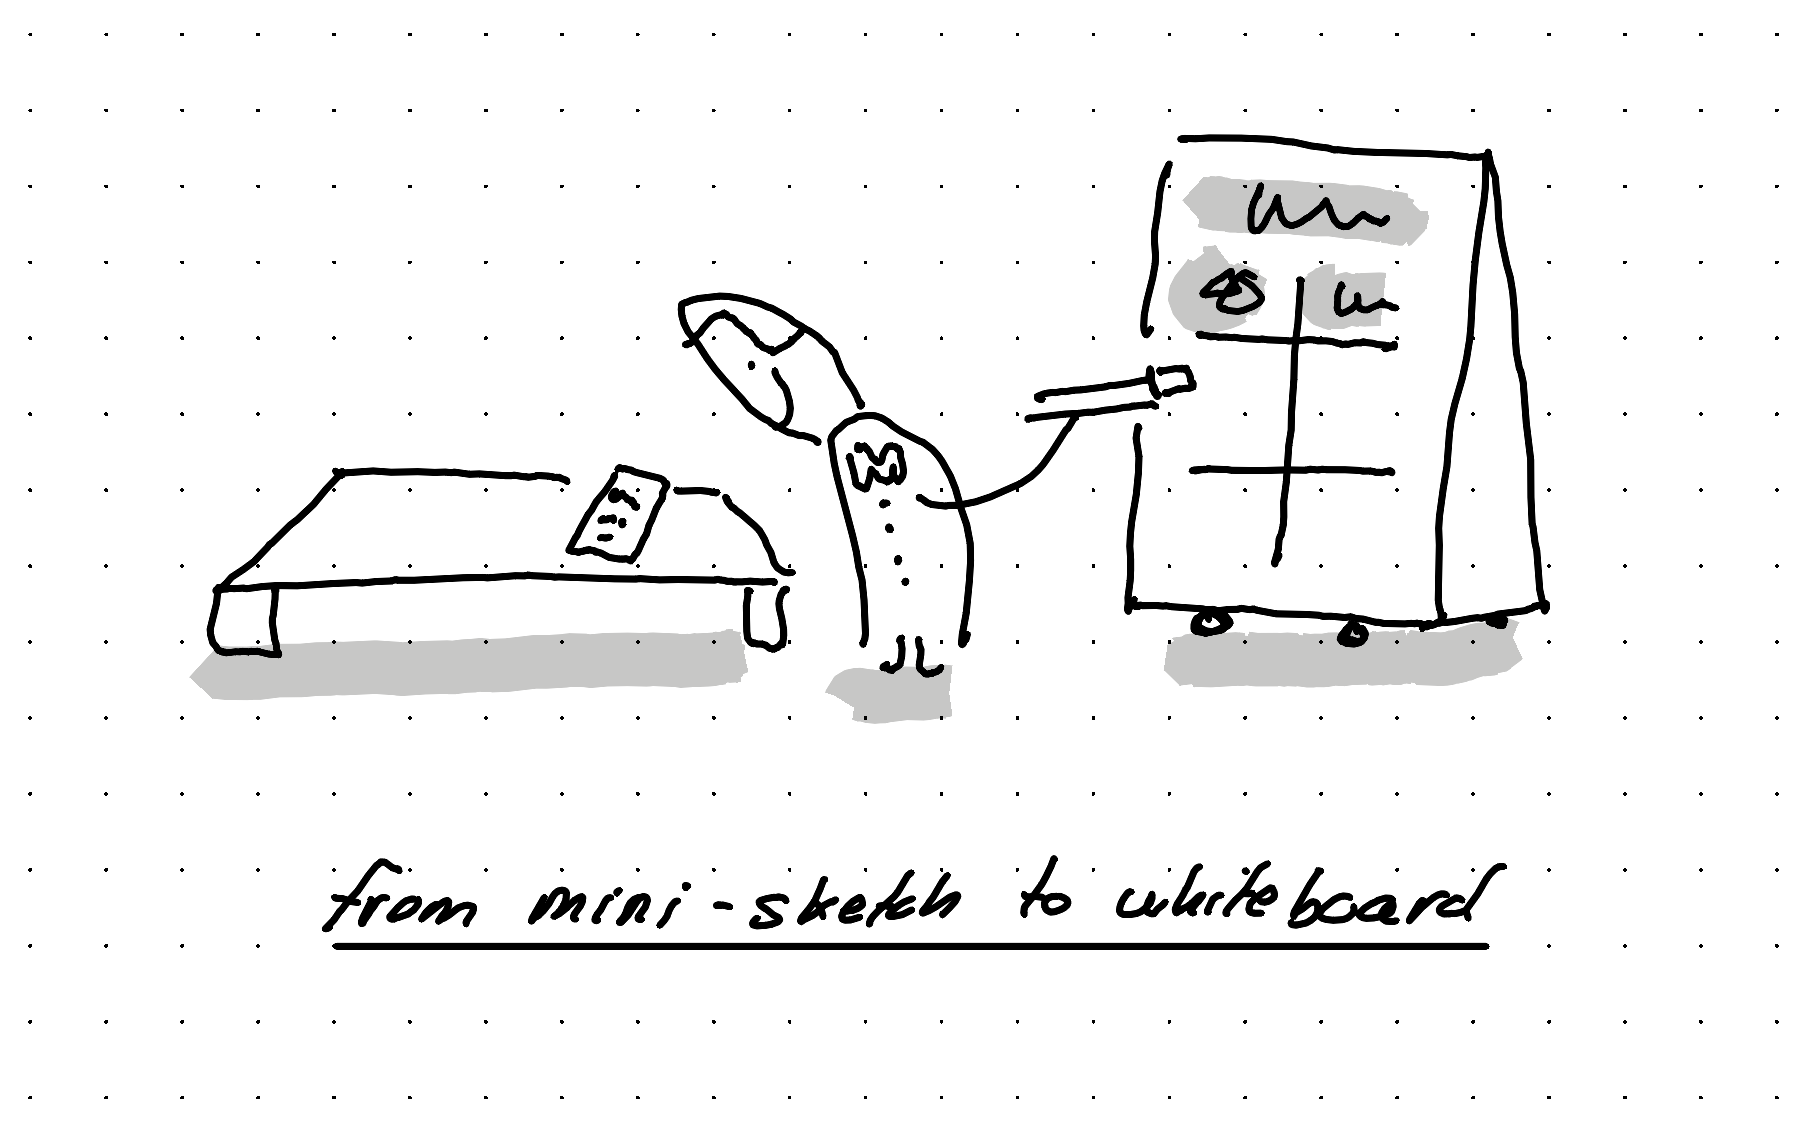
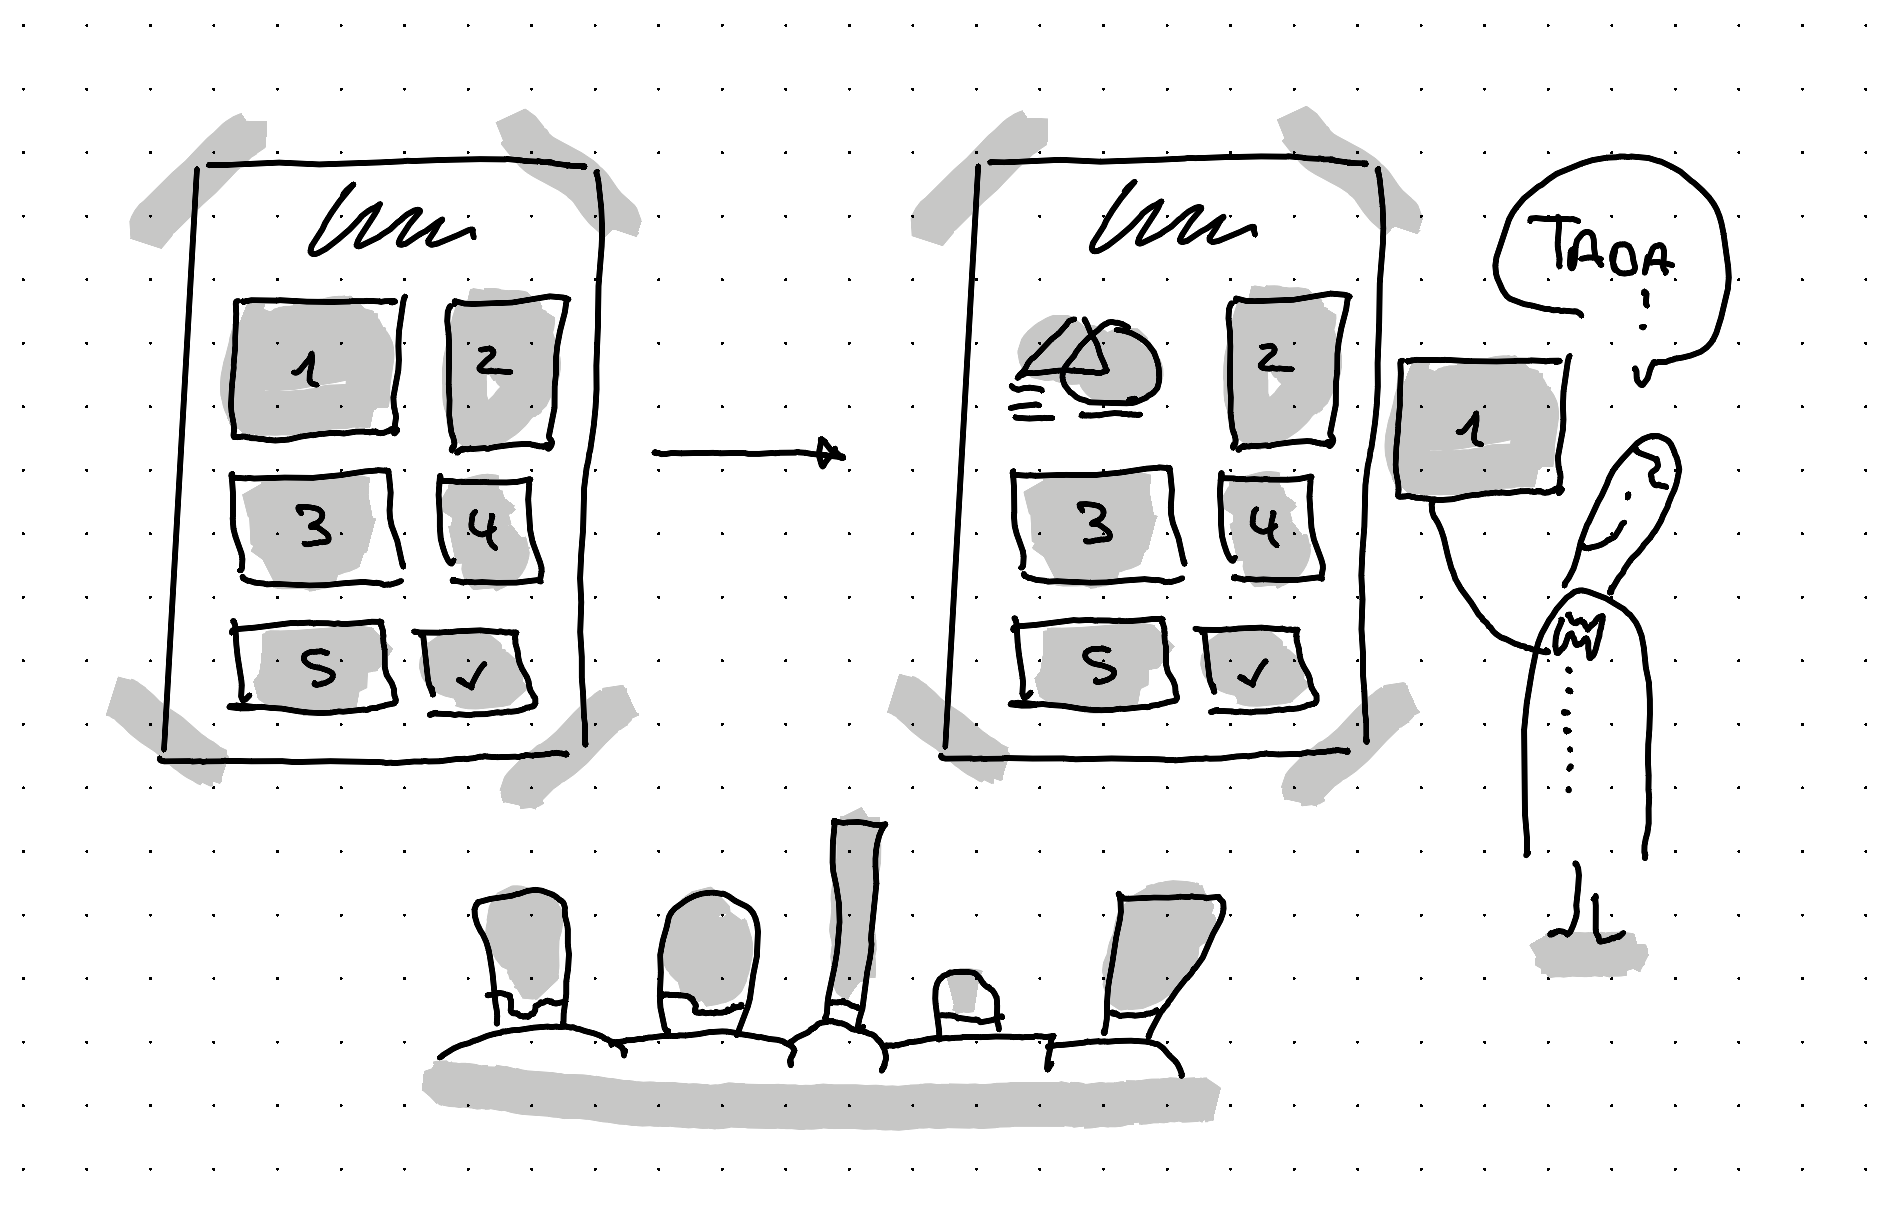
Later I drew again in big the five sketches on a huge whiteboard that I wanted to use as the basis of my course.
Develop the sketches in writing
Then over the next few weeks, for each sketch I either linked back to an article I already wrote in the past about that idea. And when I didn't yet have an article of my own written about this idea, I wrote an article.
By writing an article about that sketch, it helped me think through the details, prepare some additional metaphors and even some jokes.
Share it within and outside
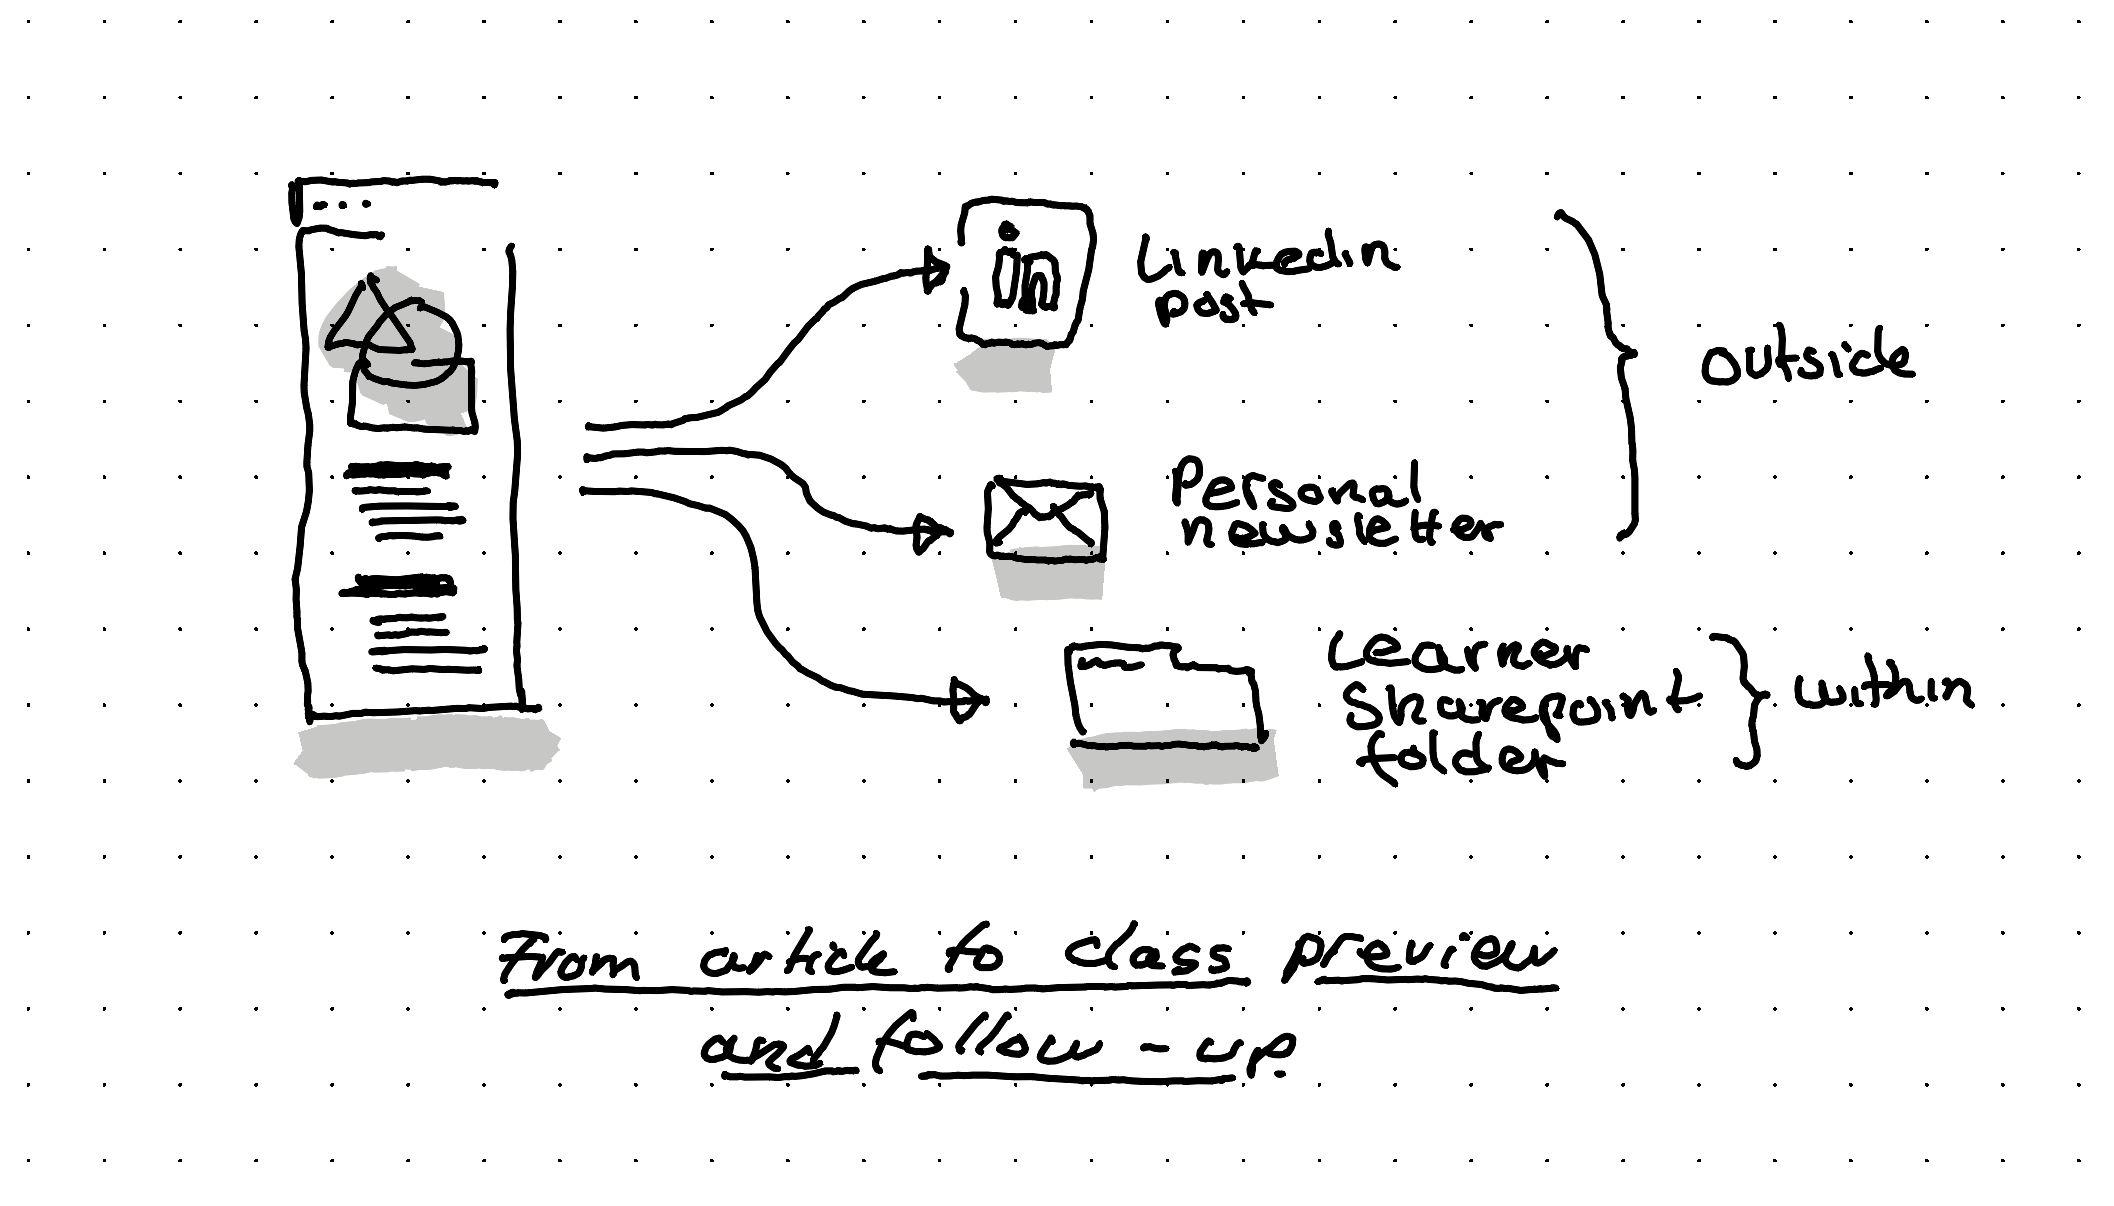
By having all this ready, I could upload on the Sharepoint we use for the learners the PDF of my early 5 sketches, and links to the five articles that go in depth for the curious ones.
I've also shared these sketches as Linkedin posts and within my newsletter. So others out of the program benefit from parts of it but more importantly, learners that follow my work online, already get a bit of a preview.
During the class, hide and reveal
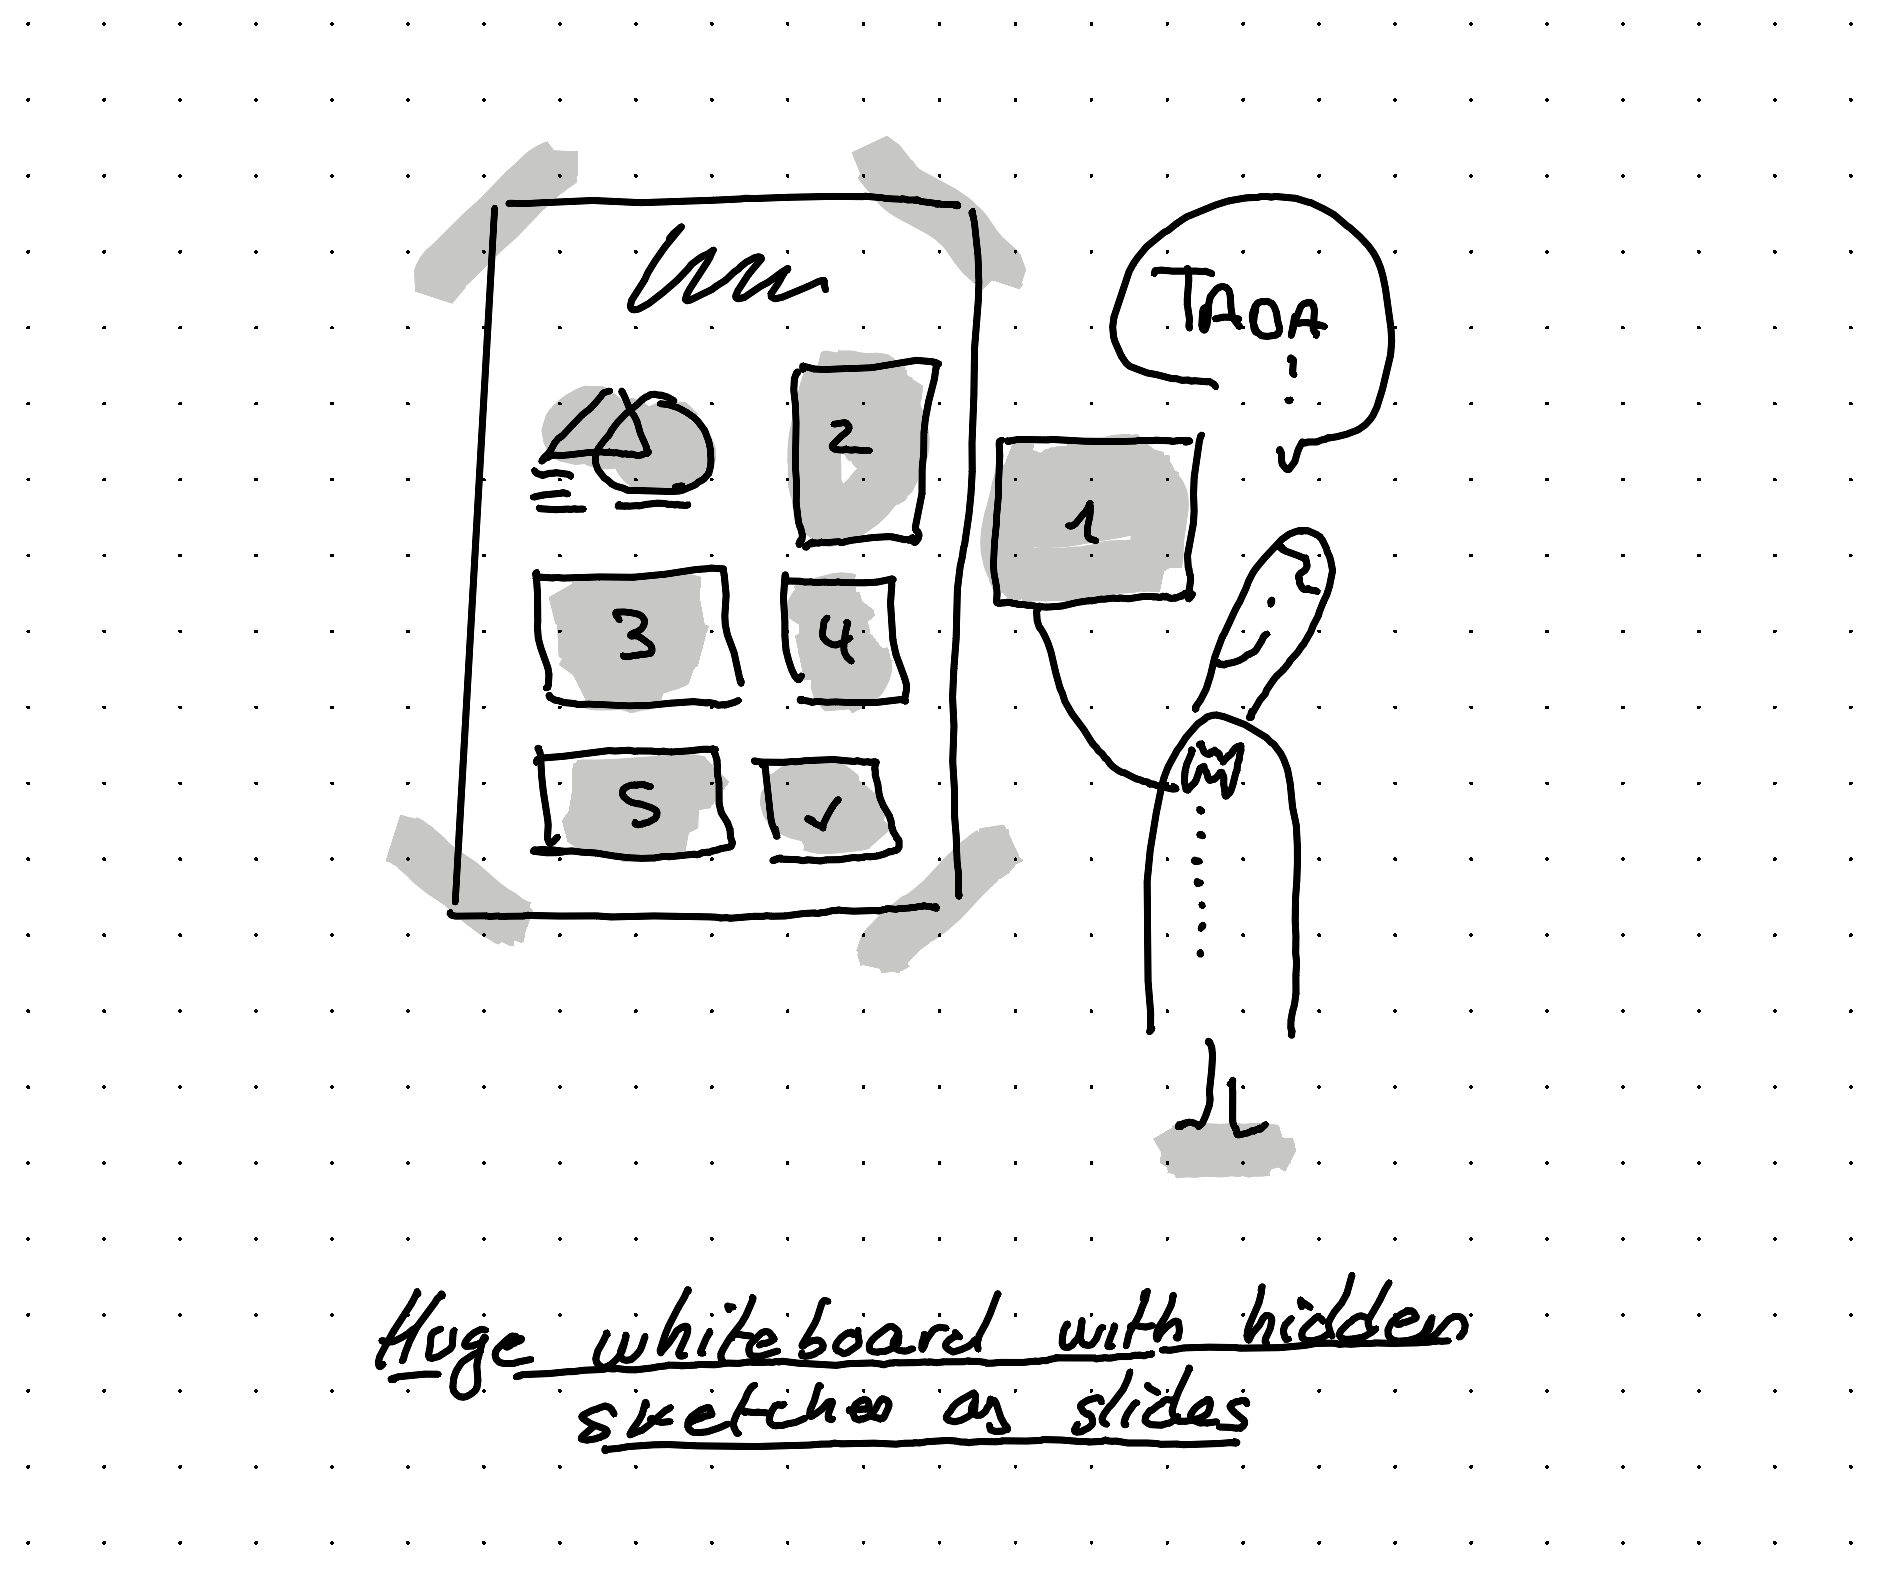
When it was finally time to run the course, I added a sheet of paper on top of each illustration. And then, step by step I removed each sheet of paper to reveal the illustration and the key idea.
Just like slides. But analogue, with the added benefit that you still see the previous slides, when a new one is revealed.
The start of a longer transition
This is a first tiny experiment for me to go without digital slides. I'll continue to try out other ways to use sketching as the main medium. For example by trying out live sketching.
Backstage of this article
This article was illustrated on a refurbished Remarkable II tablet. The text was written on the same tablet using a type folio keyboard. You can see the original note, in the PDF below.