How I shoot my online course videos
How I shoot my online course videos
The Backstage Blog
September 2023
September 2023
December 2022
December 2022
November 2022
November 2022
September 2021
September 2021

This is a more technical behind the scene article. In this article I’ll show you how I shoot my online course videos, what’s the gear I use and why.
The studio: our living room

How messy it looks in real life
I don’t shoot my videos in a proper studio. That would cost too much. So I just do it in the living room of our appartement. My wife has been really nice in accepting that I destroy the nice vibe of our living room so that I could shoot my videos at home.

How it looks in the videos
Light: natural light and picnic table wrap
I’ve tried to use lights but I have to admit it’s really a mess to use. And the colors just looked like shit. So I tried to work only with natural light. As we have a huge window in our living room that works pretty nicely. The only problem I had is that the light can be too harsh when it’s really sunny out there. So I just transformed our window in a big soft box. To do that I used the paper you use to wrap tables when you do a big picnic. Cheap, but it works well. This helps soften the light and create nicer shadows.
Prompter: my iPad, iPhone a stool and the Teleprompter app

I couldn’t just tell a story in front of a camera. I hate that thing so much that it makes it impossible for me to be natural. So I use a prompter where I can just read the text. That works nicely for me as I write in the same way than I speak.
Technically to make it work it has been a bit a pain in the ass in the beginning. I tried many teleprompter apps on my iPad. I even found one that had a great concept: it scrolls when you talk and stops when you don’t speak. But when you do mistakes you have to stand up, go to the iPad, scroll back to the top and start again. Imagine if you do it wrong five times in a row.
Finally I found a nice app that works nicely. It’s called Teleprompter Premium. The nice thing about it is that you can use your iPhone as a remote for the iPad. This means that when I do a mistake, I can go back to the line I fucked up without having to stand up and go to the iPad. A huge time saver!
Sound: a cheap lavalier microphone
In the photos above you see that I tried at first to record my voice with a tiny shotgun mic. But as I live next to the train station it also captured the sounds of the trains (you can see it in my early prototypes). I quite like the fact that I wasn’t wired to my camera. But the sound sucked way too much. So I finally decided to buy a lavalier mic. The one I bought is the RØDE smartLav+ with the SC3 Adapter (so that I can record the sound in my camera) and the RØDE SC1 TRRS extension cable (so that I can record at a bigger distance).
The whole thing cost me about 100 bucks, so it’s quite cheap. And the sound is already way better than what I had before.
Camera: my Nikon D750 camera
For the image, I recorded the videos on the camera I already had, which is a Nikon D750. Not sure it’s the best camera for video, but it worked for me. The good thing about this camera is that it can work quite nicely when there isn’t much light. So even when I put my picnic wrap on the window I can have a quite nice image.
I wouldn’t recommend that you buy this camera because until now I didn’t figure out how to have continuous autofocus in video mode. This means there are moments in the videos where I’m not sharp anymore.
Editing: ScreenFlow 8
For the editing, I used at first ScreenFlow 7 which I already owned. It’s a really nice and simple editing software. Finally, I bought the update to screen flow 8 for two reasons: the styles and the included media library.
The styles
Color correction is something you have to do on every video. Styles allow you to save settings and re-use them in another project. As I had to edit 100 videos being able to save my color correction settings was a huge time saver.
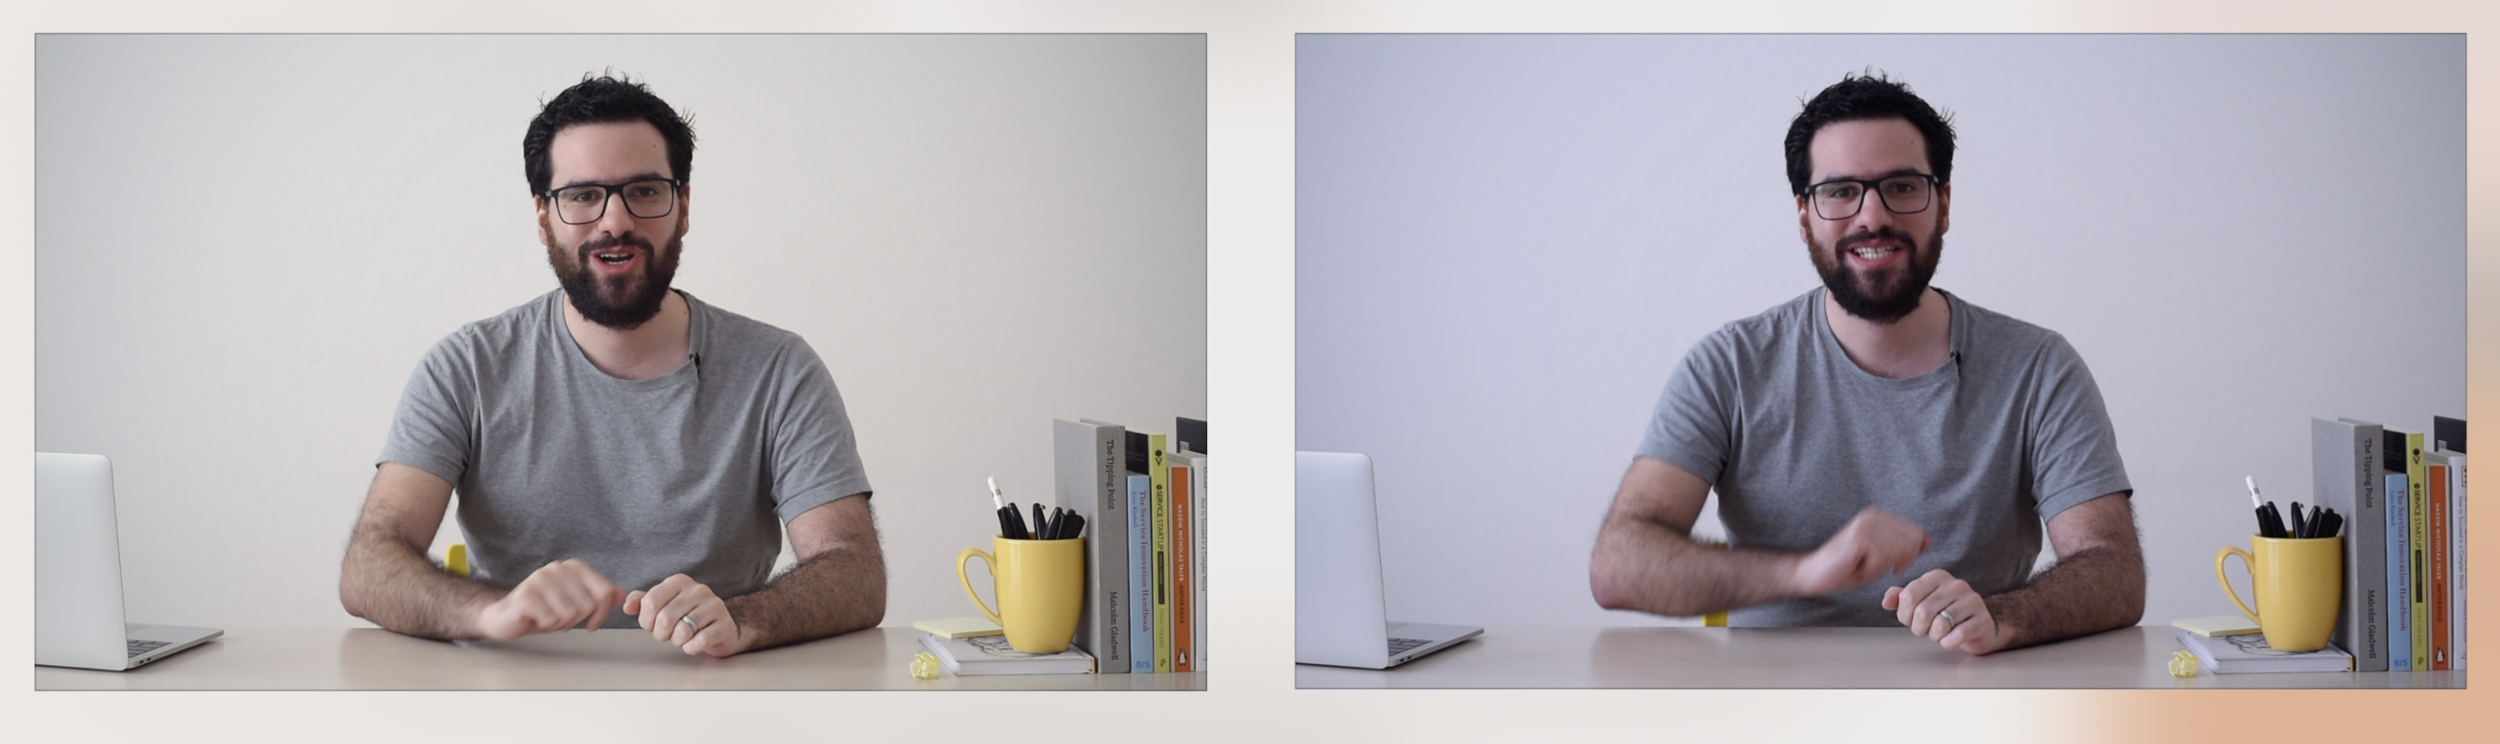
On the left: a color corrected image. On the right the image as it comes out of the camera
The media library
To make my videos less boring to watch I use a lot of b-roll footage. These are pieces of videos that are just decorative or illustrate what I’m saying. As in my first course I created 100 videos, shooting this footage would be crazy! It would take years as in every video I have around 5-10 b-roll sequences.
At first, I used the service StoryBlocks. It offers unlimited stock videos at a monthly fee. But, I discovered that Screenflow 8 proposes the exact same footage for a cheaper yearly price. About 60-80 bucks. And I can search for the footage directly in the app.
By having screen flow 8 with this media library, I can now simply search some stock video, drag and drop it in my timeline and done. Before, I had to open my browser, look for videos. Then download it. Wait. And then finally put it in my timeline. Now as everything is integrated it’s a huge time saver. Plus it’s also cheaper.
Music
The background music I use in my videos come either from Envato or are open source music you can find on youtube.
Going further
Tools are just one part of the process. I wrote a few other articles that can be of interest to you, for example, one titled: How I prototyped the videos of my first online course
I hope this gives you a sense of all the work which goes behind an online course.
The online course
All these tools allowed me to create an online course with 100 videos. This course teaches you principles, tips, and tricks to create a better customer and user experience in your services or products. As you are a pretty motivated reader and made it to the end I have a little gift for you. By following this special link you get a 30% discount on the course.
— Written on April 3, 2019