- Feb 11
How do I create and manage templates in a simple way on my Remarkable tablet?
- Daniele Catalanotto
- Productivity, Remarkable
Published in the Backstage Blog
Custom templates
There is no official support to custom templates in the OS of a Remarkable tablet. There is apparently a way to "hack" the tablet to make it happen, but that setup feels a bit overkill.
There is a simpler hack : creating templates by hand with multiple layers.
1. Draw your template
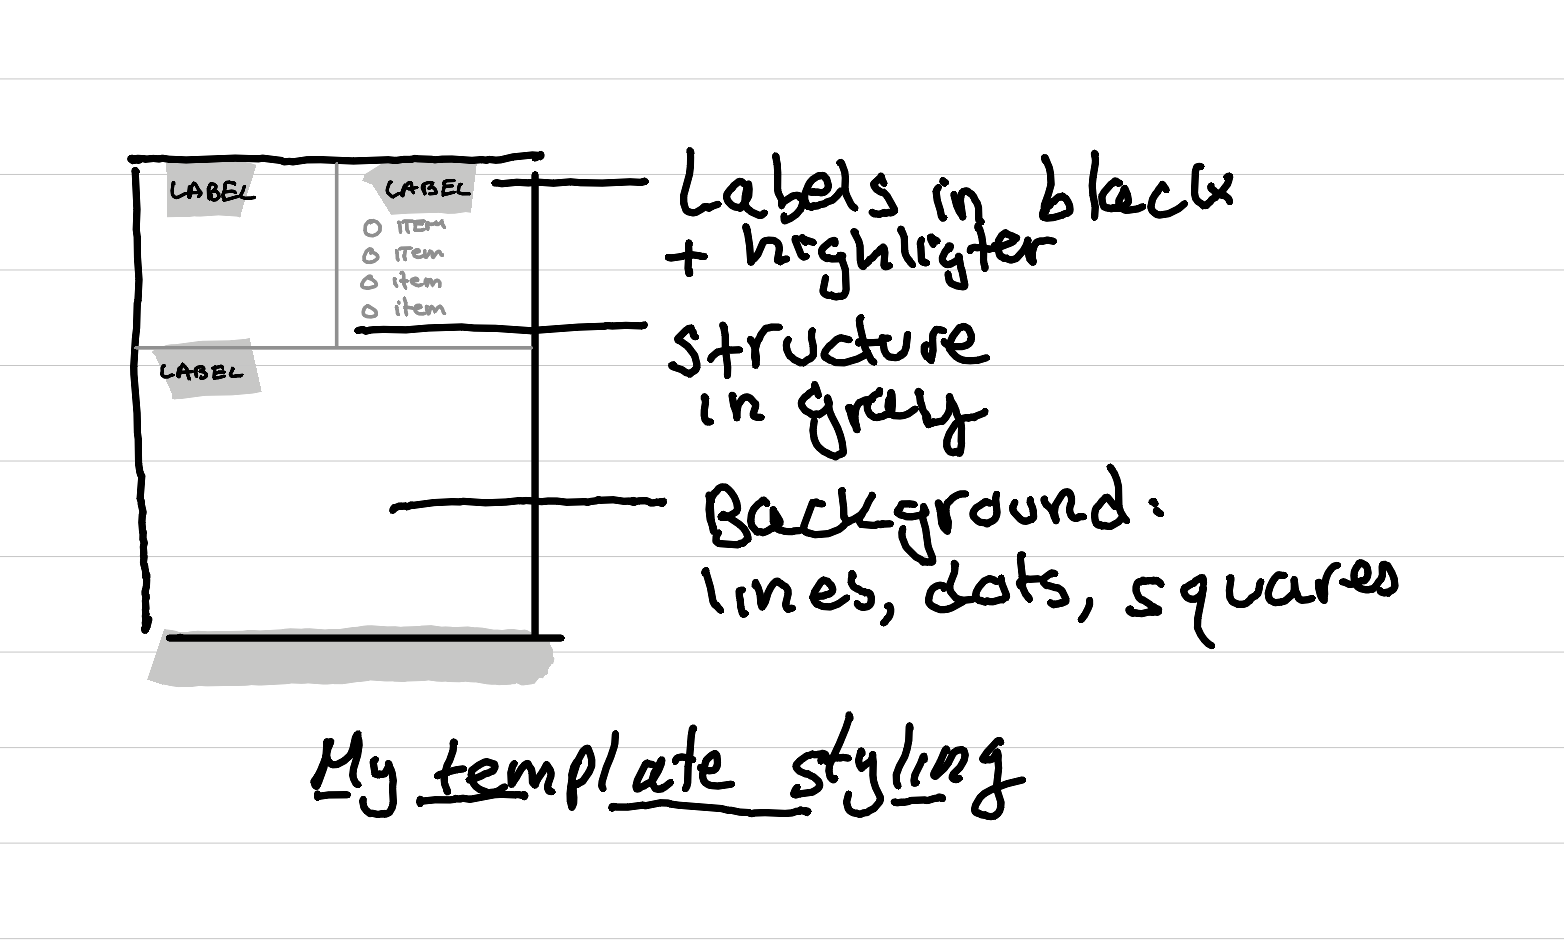
First you need to draw your own template. I like to do that by using as a background either a "small lined" or "small grid" official template as a basis. It makes it easier to have straight lines. Then I draw the structure of the template with gray lines and use black text for the labels.
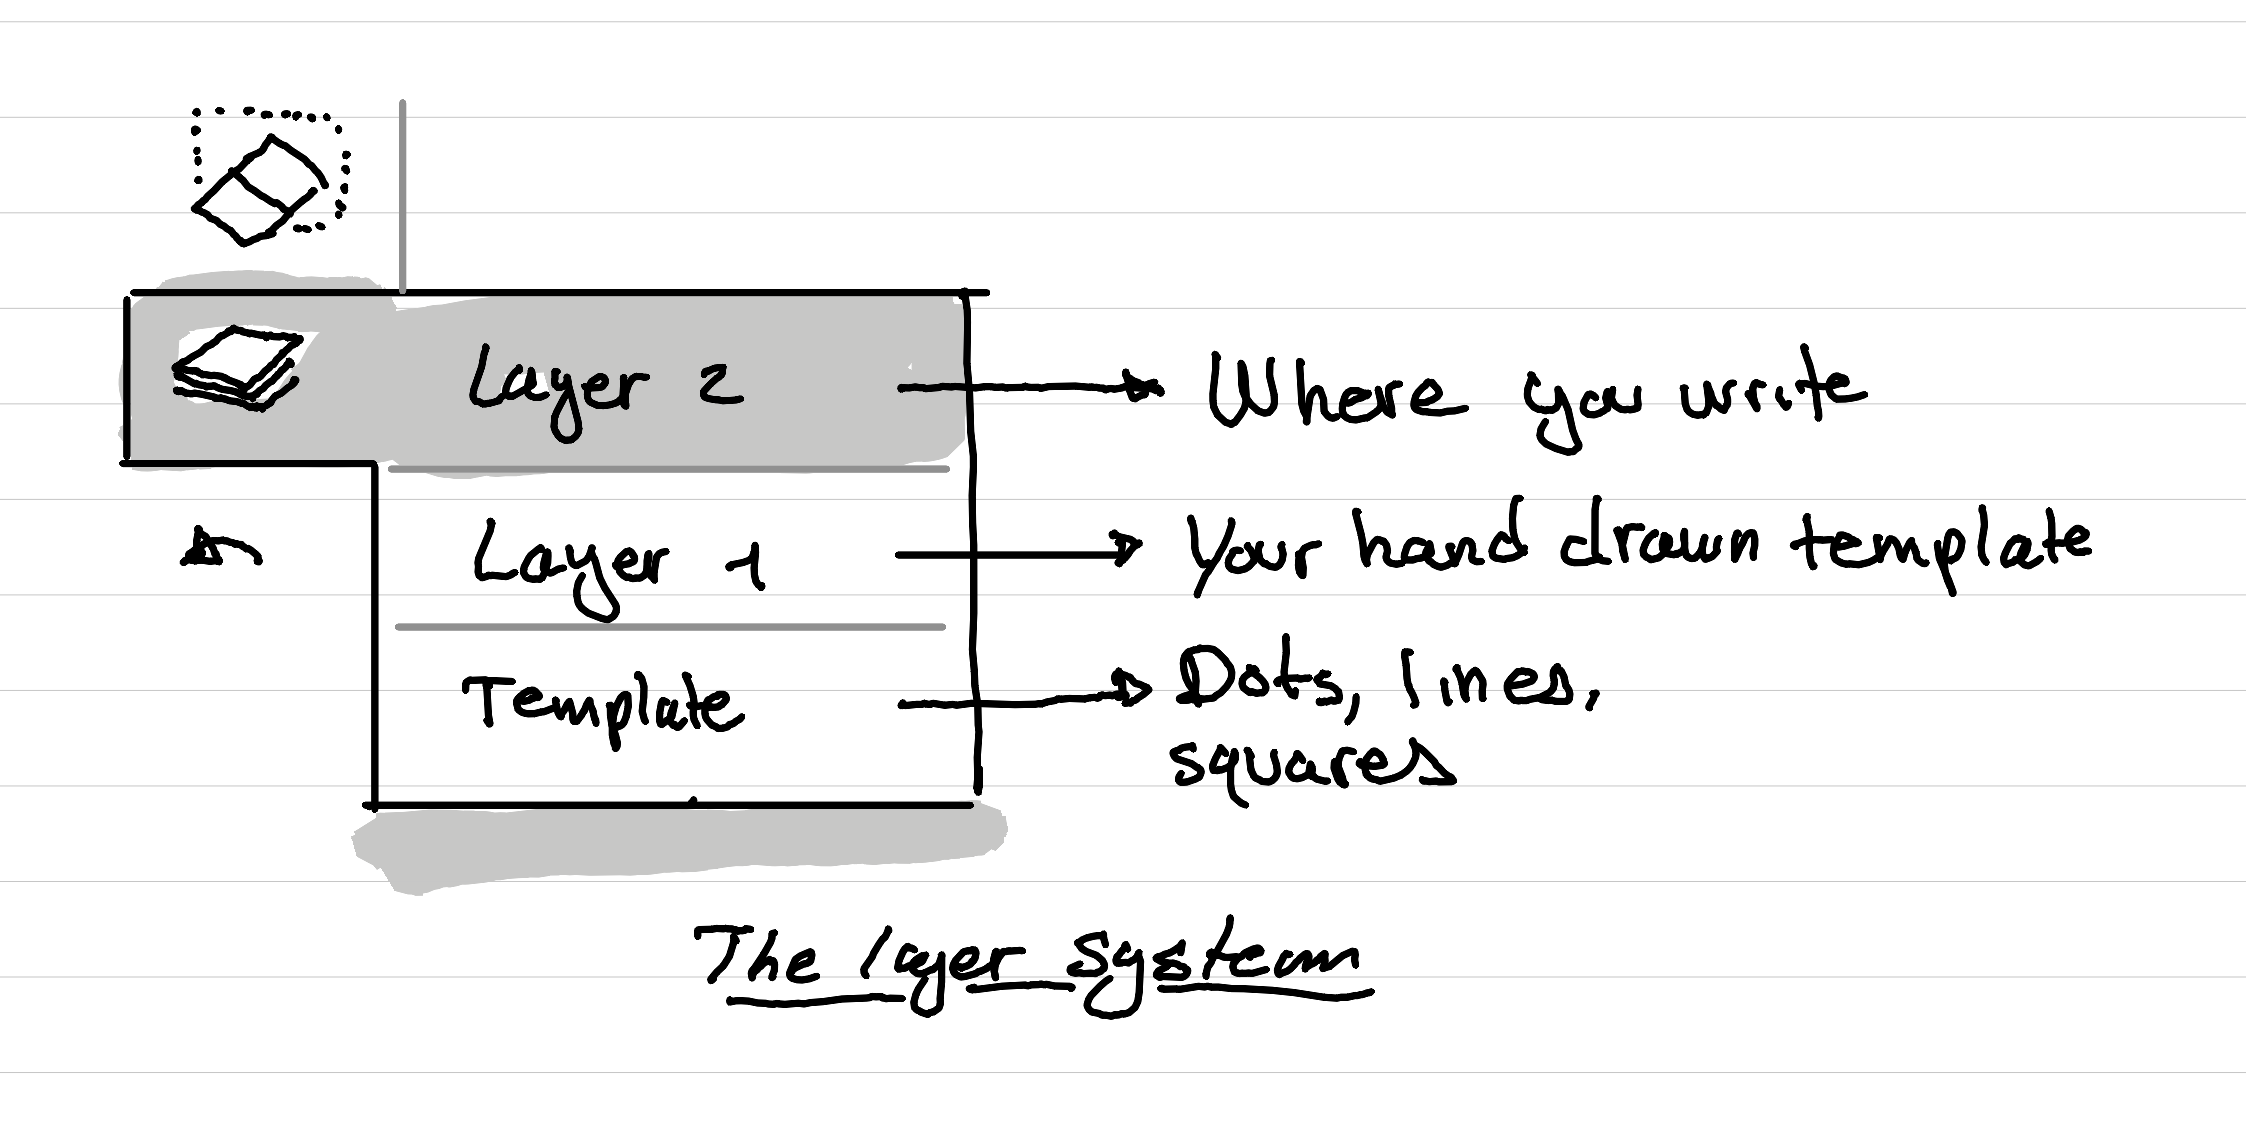
2. Add a layer
The most important thing is to then add a new layer from the sidebar. So when you'll erase text or drawings it will erase only what you've added on top of your template and not the template itself.
3. Duplicate
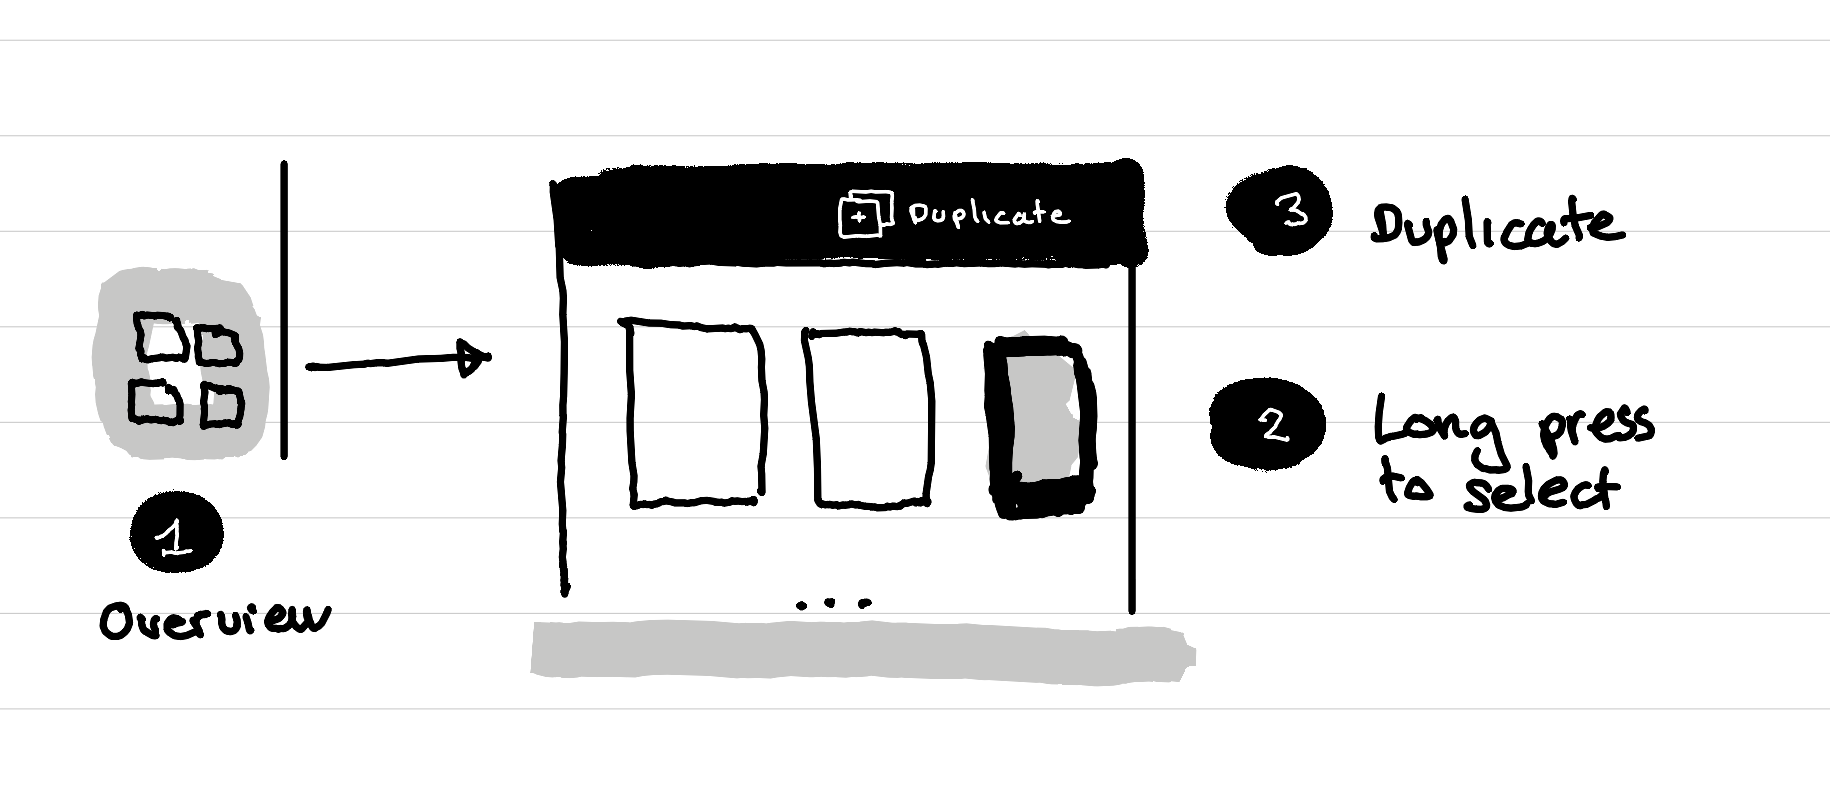
In the sidebar you can click on the four squares icon to see all the pages of a notebook. Then long press on your new template and finally hit "duplicate" in the top bar.
You now have a template ready to use.
4. Tips for better templates
I like to keep my templates within a note book at the end of the notebook so that they are easy to find.
Additionally as you can scroll down in a page I like to use this feature in my templates with what I call a "peak section".
For example in my daily planner I have right at the edge a section for tasks for the next day.

The official templates I actually use
Default templates
There are three default templates I use pretty often:
Lined small: for writing, like for this blog post.
Dots small: for drawing and mapping
Grid small: for creating templates, graphs and other stuff when I want everything to be well aligned.
rM methods templates
From the template library called "rM methods" I use at the moment only the "meeting minutes template".
I've tried a few other ones but I still prefer to create my own templates for things live briefings, daily planner or week overview.
Backstage of this article
This article was written and illustrated by hand on a Remarkable tablet II. The text was then automatically transformed in a typed text with the Remarkable Connect service. If you are curious you can download the original note.
Newsletter
Weekly Service Design Digest
Meet the creator
I worked with clients from all over the world to help them find innovative solutions to their problem. I've been blessed to be able to learn a lot.
Today I want to share these learnings back with the community. That's why I've built the Swiss Innovation Academy.